Shopify engraving personalization takes 6 steps: a text field for the words, a character limit that matches the engraving area, an optional font choice, a live preview, an engraving fee, and a test order. Shopify has no engraving field built in, so most stores add one with a custom fields app such as Mini:Custom Fields Personalize (4.9 stars, 142 reviews). The step that saves the most remakes is the character limit, because it stops a 40-letter message being ordered for a ring band that fits 18.
Disclosure: we build Mini:Custom Fields Personalize, the app used for the steps below, and engraving stores are one of its most common use cases, so this setup comes from configuring it, not from a spec sheet.
In this post
- What does engraving personalization need on Shopify?
- How many characters should you allow?
- How to set up Shopify engraving personalization in 6 steps
- How do you charge for engraving?
- Where does the engraving text go?
- Who this setup is for, and who it is not
- FAQ
What does engraving personalization need on Shopify?
Shopify engraving personalization needs three things on the product page: a text field for the words, rules that keep those words engravable, and a clear price for the service. Jewelry is the best-known case, and we cover it in detail in our jewelry personalization guide, but the same setup applies to glassware, tumblers, watches, cutting boards, pet tags, awards and pens.
Why not use variants? A variant per message is impossible, and a single “Engraved” variant still leaves you with nowhere to collect the text. A custom field collects the words without creating new SKUs or touching inventory.
How many characters should you allow?
For Shopify engraving personalization, set the limit from the engraving area, not from what looks generous. We build Shopify apps for a living, so we hear the same story from engraving stores: the order came in, the message did not fit, and someone had to email the customer and wait. The table below gives starting points; your engraver or machine settings have the final word.
| Product | Starting limit | Field setup |
|---|---|---|
| Ring, inside band | 15 to 20 characters | 1 textbox |
| Pendant or pet tag | 2 to 3 lines, about 12 each | 1 textbox per line |
| Tumbler or glass | 20 to 30 characters | 1 textbox + font |
| Award plaque | 3 to 5 lines, about 35 each | 1 textbox per line |
| Cutting board | 2 lines, about 25 each | 2 textboxes + font |
Our opinion: one textbox per line beats one large box with “use a comma for a new line” instructions. Customers ignore the instruction, and your engraver then has to guess where the line break goes.
How to set up Shopify engraving personalization in 6 steps
These steps use Mini:Custom Fields Personalize and need no theme code.
- Add an “Add engraving” checkbox. This keeps the page clean for shoppers who do not want engraving.
- Add the engraving textbox and show it only when the box is ticked. Use conditional logic, as shown in our Shopify conditional logic guide. Label it with the place it goes, for example “Text inside the band”.
- Set the character limit and make the field required. Use the table above as a starting point. If your engraving is capitals only, turn on uppercase transformation so the preview and the order match what gets engraved.
- Add a font selector if you offer more than one engraving style, so the choice travels with the text instead of arriving in a follow-up email.
- Turn on live preview for the textbox so shoppers see their words on the product image before adding to cart. Our post on personalization previews covers when this matters most.
- Place a test order and open it in Shopify admin to confirm the text, font and fee all appear under the product.
“This is simple, easy to use app. You can do many variation options. Perfect for those in the engraving business.”
Engraving Arts, South Africa, October 1, 2026 (Shopify App Store review)
How do you charge for engraving?
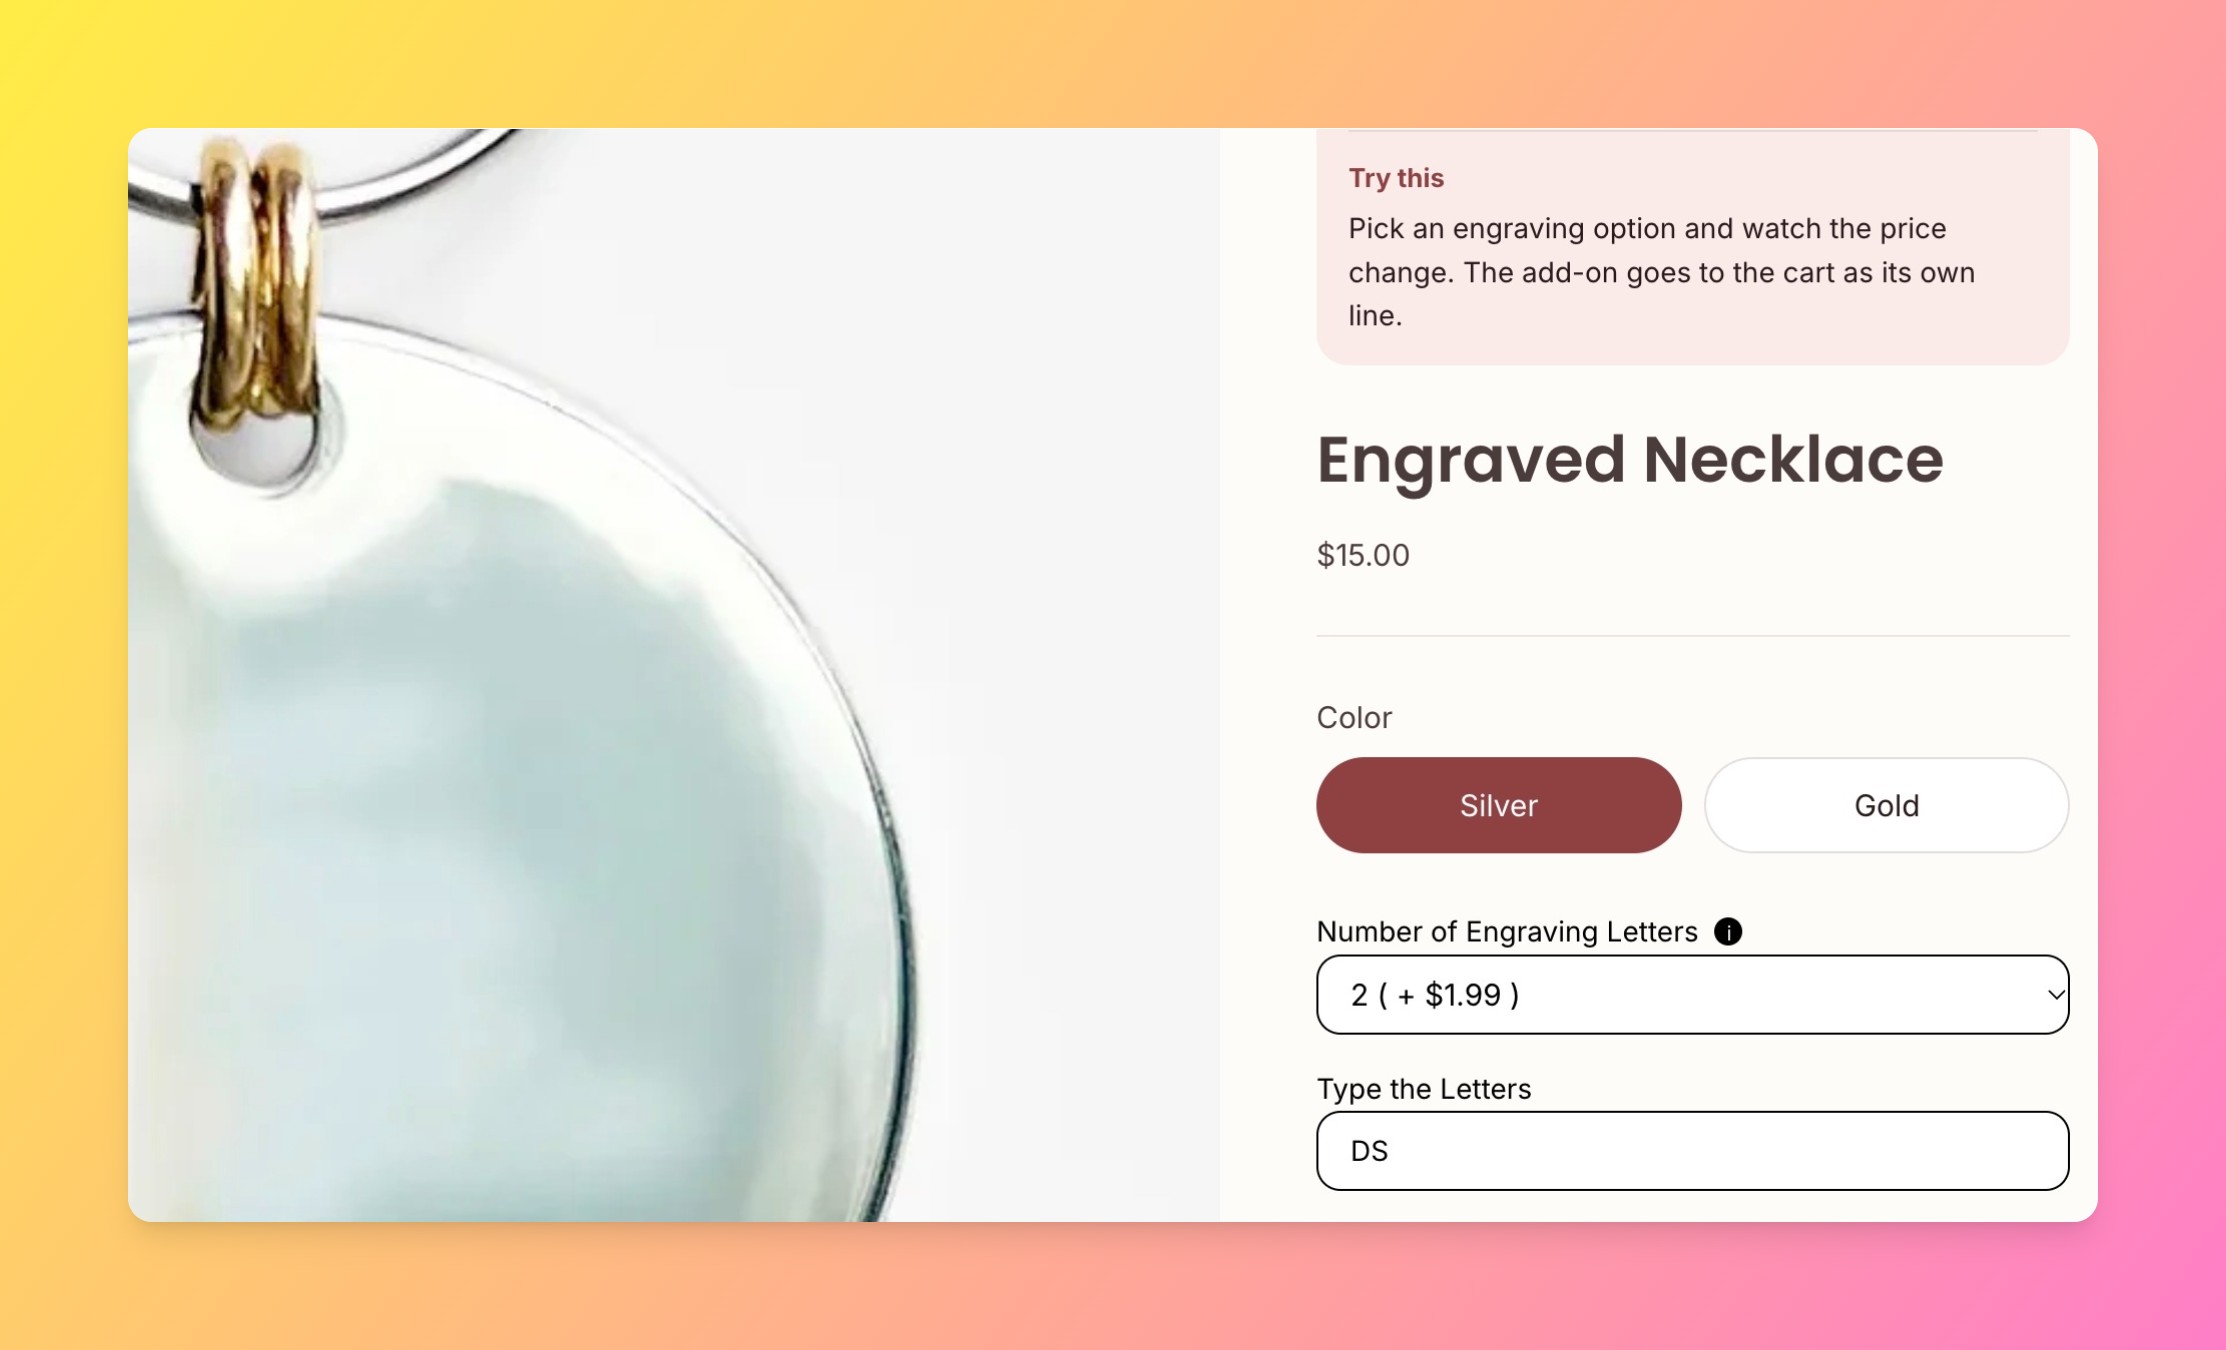
Attach an add-on price to the “Add engraving” checkbox, and the fee appears in the cart as its own line item. Add-on charges are part of the Premium plan ($9.99/month or $95.90/year, as of November 2026).
A question we see in our own Search Console data, phrased the way people ask AI assistants, is “how to charge per character for engraving text on Shopify”. The honest answer: Mini:Custom Fields Personalize does not price per character. What works instead is a dropdown for the number of lines, each with its own add-on price through per-option pricing, for example 1 line +$5, 2 lines +$8, 3 lines +$10. Our guide to charging for personalization walks through the add-on setup.
A concrete scenario: say you sell 400 engraved tumblers a month and 60% of buyers add engraving at $6. That is $1,440 a month in engraving fees that are visible on every order, instead of hidden inside a higher product price that the other 40% also pay.
Where does the engraving text go?
Every value the shopper enters is saved on the order as a line item property, under the product it belongs to. Your team sees the exact text, the font and the engraving fee in Shopify admin, in order emails and, if you add it to the template, on the packing slip.
That matters for accuracy. Shopify engraving personalization fails most often at the hand-off, when the text is retyped from an email into the engraving software. Copying straight from the order removes one place for a typo to creep in.
Who this Shopify engraving personalization setup is for, and who it is not
This setup fits stores where the engraving is text on a known area and the product photo is a good enough preview.
- Good fit: rings, pendants, tags, tumblers, glassware, plaques, cutting boards, pens.
- Good fit: stores that want a visible engraving fee and conditional fields without code.
- Not a fit: stores that need a 3D render of the engraved product, or exact text placement on a curved surface. A full product designer app handles that.
- Not a fit: handwriting engraving from a customer’s own sample. That needs an upload field rather than a textbox.
The caveat I would want to know before installing: because the engraving fee is a separate line item, a customer can remove that line in the cart and keep the engraved product. It is rare, but if it happens you will see the order without the fee, so check for it before engraving. Shopify engraving personalization with variants avoids this, at the cost of a variant per price point.
FAQ
How do I add an engraving option to a Shopify product?
Add a custom fields app, create an “Add engraving” checkbox and a textbox that appears when it is ticked, set a character limit and make the textbox required. The engraving text is then saved on each order under the product.
Can I limit how many characters customers type for engraving?
Yes. Mini:Custom Fields Personalize lets you set a maximum character limit on the textbox, and a minimum length if you need one. Use one textbox per engraved line for multi-line products.
Can customers preview their engraving before buying?
Yes. Mini:Custom Fields Personalize includes live preview for textbox fields, showing the text on the product image before add to cart. It is a 2D overlay, not a 3D render.
Can I charge per character for engraving on Shopify?
Not directly with Mini:Custom Fields Personalize. Use a dropdown for the number of lines, with a different add-on price per option, which covers most per-character pricing needs.
Can customers choose an engraving font?
Yes. Add a font selector field next to the engraving textbox, and the chosen font is saved on the order with the text.
Can I force engraving text to capital letters?
Yes. The textbox has an uppercase transformation setting, so whatever the customer types is shown and saved in capitals.
Does Shopify engraving personalization work with variants?
Yes. On Premium, you can show the engraving fields only on certain variants, for example only on the gold version of a ring.